- World premiere: CENTERWAVE 6000 for dimension measurement of hose and tubes of up to 1,600 mm diameter
- Premiere: Optical laboratory testing system for plastic pellets PURITY CONCEPT V with color detection
- Live material tests with the PURITY CONCEPT V
- Interactive exchange in the “Innovation Corner” – customer ideas for measurement technology of the future
Bremen. At K 2019 from October 16 to 23, 2019, SIKORA, manufacturer and worldwide supplier of advanced measuring and control technology, presents a broad portfolio of innovative systems for quality control and process optimization for hose and tube, sheets as well as plastics industries. Visitors have the possibility to bring along plastic pellets for a live and on the spot inspection and analysis with the laboratory testing system PURITY CONCEPT V. In the “Innovation Corner”, visitors are cordially invited to contribute their ideas regarding measuring technology for hose and tube as well as plastics applications. The appearance of the company from Bremen at K promises pure innovation.
World premiere of the CENTERWAVE 6000 for dimension measurement of hose and tubes of up to 1,600 mm diameter
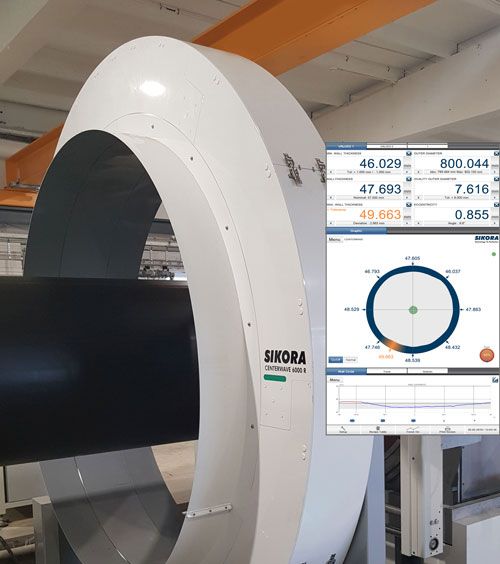
With the world premiere of the CENTERWAVE 6000/1600, SIKORA presents a measuring system of a new dimension. The system was developed especially for quality control of plastic tubes and pipes during extrusion. Due to its design, the system offers a precise measurement of tubes with a diameter from 250 to 1,600 mm. The CENTERWAVE 6000 is based on innovative millimeter wave technology and measures continuously and completely over 360 degrees of the circumference of the pipe the wall thickness, the diameter, the ovality, the inner profile and the sagging. “The CENTERWAVE 6000 does not only impress because of its dimensions,” says Christian Schalich, Head of Sales Business Unit Hose & Tube at SIKORA, “but foremost due to its benefits resulting from the technology for the extrusion process.” Nominal dimensions are quickly reached, start-up scrap is avoided, the highest quality guaranteed and processes are optimally controlled. Furthermore, the system does not require any coupling media, it measures precisely and independently to external influences, such as temperature or plastics material, and does not require calibration. “Furthermore, the device determines automatically the exact refractive index”, says Schalich. It defines the intensity and how fast radiation travels through the material and is therefore decisive for the measuring accuracy. Manual input of modifications of the production conditions is not required. “The operator benefits from a system that, integrated in the line, delivers reliable and reproducible measurement values directly after start-up”, adds Schalich.
Thickness measurement in the sheet extrusion with the PLANOWAVE 6000
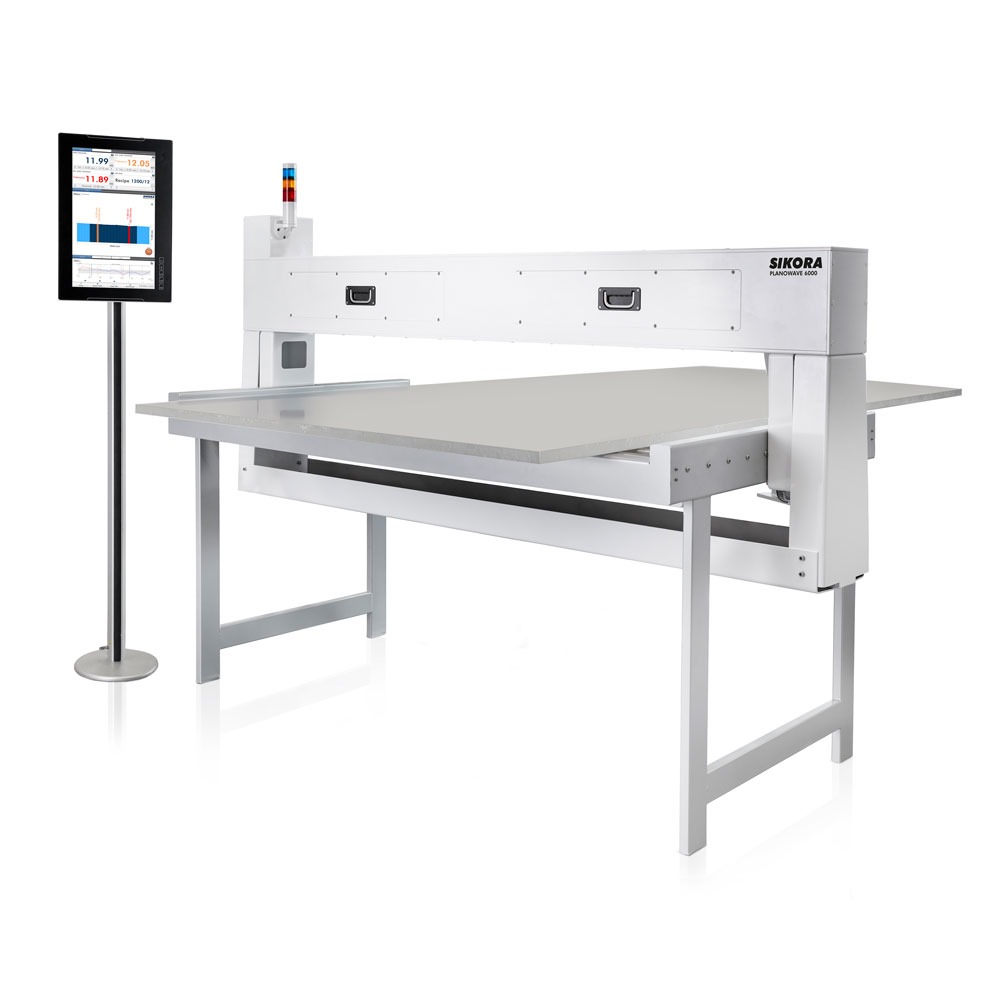
SIKORA’s PLANOWAVE 6000 is a non-contact measuring system that is used for non-destructive thickness measurement during the extrusion of plastic sheets. The system measures sheets made from engineering plastics like POM and high-performance plastics like PEEK. The PLANOWAVE 6000 is also suitable for the measurement of transparent and synthetic plastics like PMMA and PVC-FOAM as well as for glass. The measuring method is based on millimeter wave technology for the highest measuring accuracy independent of material and temperature of the sheets. A calibration on the material is also not needed. The PLANOWAVE 6000 can be integrated directly into the production line at the hot or cold position. The visualization of the measuring values is done in real time at the monitor of the processor system ECOCONTROL 6000. Besides a numerical display of the measuring values at any number of measuring points over the width of the sheet, the operator also receives a graphical display with extensive trend and statistical functions.
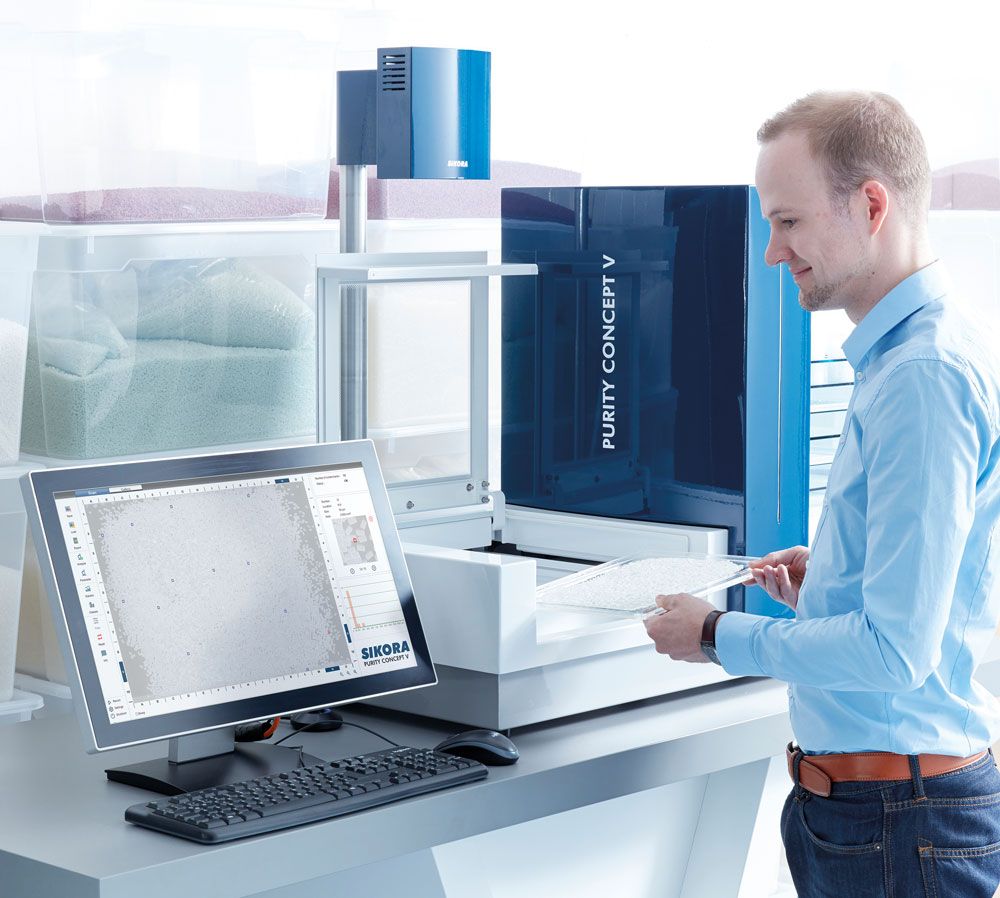
Premiere: Optical laboratory testing system PURITY CONCEPT V with color detection
With the K premiere of the PURITY CONCEPT V, SIKORA presents an optical laboratory testing system for plastic material. The system is an automated light table where plastic pellets, placed onto a sample tray, are being moved through the inspection area. Within seconds, the material is inspected by a color camera. A projector optically marks all contaminated pellets directly on the sample tray. By evaluating the images, contamination, like black specks, from a size of 50 µm on the surface of transparent, translucent and colored material are automatically detected, visualized and statistically evaluated. A clear allocation of the contamination and follow-up inspection are possible at any time. Another feature of the optical laboratory testing system is the automatic detection of color deviations of the pellets.
Live material tests with the PURITY CONCEPT V
“Making technology come alive” is the central subject of the SIKORA booth at K. Within a laboratory environment, live material tests are being offered with the PURITY CONCEPT V. Customers have already been invited before the start of the exhibition to send in pellet samples free of charge, which will be inspected and analysed with the PURITY CONCEPT V directly at the booth. Alternatively, visitors can bring a small number of pellets directly to the booth for inspection and evaluation. “Real pellet tests are the best way to proof that a system works and give information on the advantages that one can achieve”, says Hilger Groß, Business Development und Area Sales Manager for the area plastics at SIKORA. “Our customers can personally convince themselves of the precision, speed and easy handling of the system,” explains Groß.
Laboratory testing system PURITY CONCEPT X with X-ray technology for detection of metallic contamination
Furthermore, SIKORA presents the X-ray based laboratory device PURITY CONCEPT X for the inspection of metal inclusions in colored pellets that would be invisible with optical systems. The automated operating principal of the SIKORA PURITY CONCEPT X, that had already been presented in 2016, is nowadays the basis of the SIKORA laboratory testing systems. Due to the applied X-ray technology, it also provides the possibility to detect contamination on the surface as well as inside pellets. “The PURITY CONCEPT X is especially predestined for sample inspection of black and colored material. Amongst others, we can see application possibilities for semiconductor material which is used for the insulation of HV cables. Metallic contamination in pellets, for example, resulting from metal abrasion in the extruder, are reliably detected and comprehensively analysed”, explains Hilger Groß.
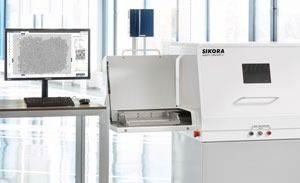
Optical online inspection and sorting with the PURITY SCANNER ADVANCED – also as “Twin Pack” for a greater material throughput
A further highlight at the SIKORA booth is the PURITY SCANNER ADVANCED for optical online inspection and sorting of plastic material. The system combines X-ray technology with up to four black and white and/or color cameras. This combination ensures the detection of metallic contamination inside the pellet, color deviations as well as black specks on its surface. Contaminated pellets are detected and automatically sorted out. Thanks to powerful processor systems and an intelligent software, the PURITY SCANNER ADVANCED is a reliable device for quality assurance. The Professional Data Analysis Management (PDAM) provides a statistical evaluation of detected contamination, sorted by size and frequency, during production as well as an image gallery of the pellets that have been detected by the optical camera as well as the X-ray camera. “Quality requirements with regard to material purity are increasing. Online inspection and sorting is therefore gaining further significance. The PURITY SCANNER ADVANCED is in his class the most efficient sorting system available on the market”, says Hilger Groß. For a high material throughput, the sorting system is available as a “Twin Pack” solution, which will be presented for the first time at K. The system is especially predestined for the optical sorting and applications, where the focus is on higher throughputs. The Twin Pack reaches throughputs of up to two tons per hour.
Interactive exchange in the “Innovation Corner” – customer ideas for a measurement technology of the future
Turning ideas into innovations and product developments that achieve the highest quality, process optimization and cost effectiveness in the hose and tube, sheets as well as plastics industries is SIKORA’s claim. The company emphasises this at K with the “Innovation Corner”. Customers are invited to personally discuss with SIKORA experts from Research and Development in a creative atmosphere their ideas, requests and technical requirements on the systems for quality control for the future of measuring technology.

