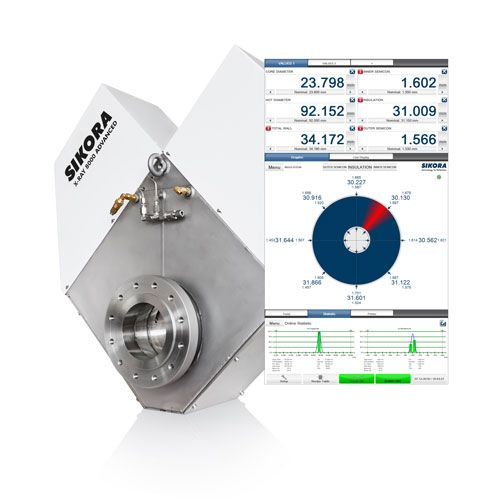
SIKORA’s X-RAY 8000 ADVANCED measures online the diameter, eccentricity and wall thickness in CV lines
The production of MV, HV and EHV cables requires high quality standards. Already since the early 1990s, SIKORA has been offering online X-ray measuring devices for quality control in CV lines. Within the extrusion line, the measuring systems are installed in the moving part of the telescopic tube, directly after the crosshead. Immediately after closing the telescopic tube and starting the high voltage, the systems measure diameter, wall thickness and eccentricity of triple layer cables directly in the CV tube where the cross linking respectively the vulcanization of the insulation takes place. Integrated within the gauge head, two movable high speed X-ray scanners take an X-ray image of the cable through ceramic windows from two diagonal positioned measuring planes.
SIKORA’s product portfolio of X-ray measuring systems for high voltage cable production includes the X-RAY 8000 NXT as well as the X-RAY 8000 ADVANCED. Technical differences are the speed of the measuring value logging as well as the starting up process. The X-RAY 8000 ADVANCED features High-Speed-Technology (HST) and is equipped with 16 measuring sensors. These measure the cable up to ten times faster than the X-RAY 8000 NXT. Thus, a direct automatic control of cable parameters to the nominal value and therefore, a faster starting up process with maximum material and cost savings are the result. Centering is optimized by the almost delay-free measurement as each adjustment of the centering screws is immediately detected and visualized at the processor system.
For a fast update of scan data, the system optimizes the scanning time by automatically adapting the scan path to the cable diameter. Due to the High-Speed-Technology, each scan of both scanners provides four measuring values ensuring the highest precision even if the cable is vibrating. Cable vibrations are visible when comparing the time differences of both scanning curves. If the cable does not vibrate, the time difference of both scanning curves is constant. Time differences are measured and compensated by the High-Speed-Technology and therefore, precise measuring values are always ensured.
In combination with a processor system, all measuring values are calculated directly from the X-ray picture by regression analysis. The radiation absorption at the layer transitions of the video image changes so that all three cable layers as well as inner semiconductor, insulation and outer semiconductor are clearly visible. This procedure ensures the highest precision and repeatability and does not require any calibration, warming-up phase or presetting for the absorption parameter of the different insulating materials.
Cable parameters are clearly visualized at the TFT monitor of the processor system. An 8-point display of the wall thickness and a color highlighting of the eccentricity, together with numerical information on its angle and size, guarantee optimum process stability. Information is displayed both numerically and graphically. The display includes a length related trend display of all values together with a graphic for the distribution curves on the single values and comprehensive statistics with min/max value as well as average and standard deviation. The use of the X-RAY 8000 ADVANCED in CV lines ensures the highest cable quality and process optimization with maximum material and cost savings.


