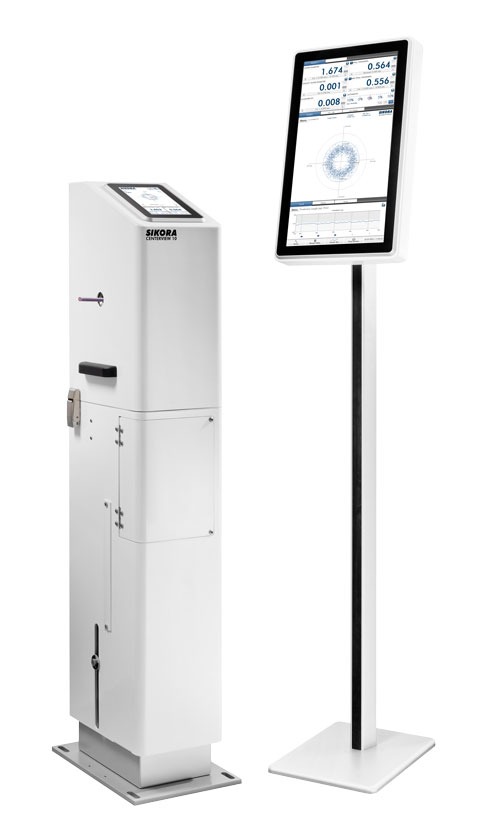
Reliable eccentricity, diameter and ovality measurement thanks to combined inductive and optical measuring method
Precise measured values thanks to an impressive measuring rate
The new model series is based on the trusted CENTERVIEW predecessor – a benchmark that is used thousands of times worldwide. The system measures the cable continuously over 4 axes. The mathematical evaluation of the diffraction signal results in an impressive 500,000 measuring points per second per measuring axis. These are summarized in 5,000 high-precision measured values per second per measuring axis. Combined with an extremely short exposure time of less than 1/1,000,000 seconds, the CENTERVIEW PRO enables accurate measurements, even with high line speeds and product vibrations. Each individually measured value achieves an extraordinarily high single value accuracy.
Reliable measured values, no matter where in the measuring field
Because of the position and diameter measurement when the cable enters and exits the measuring device, the measuring system automatically compensates for vertical and horizontal inclination and sagging of the product. No matter where the cable is in the measuring field, the operator receives reliably measured values. The automatic alignment of the measuring head to the position of the cable helps to ensure that the CENTERVIEW PRO delivers accuratly measured values even under dynamically changing production conditions.
FFT analysis to detect irregularities in the extrusion process
The CENTERVIEW PRO offers the option of FFT analysis for detecting periodically recurring fluctuations in cable parameters and predicting the expected return loss (SRL), which is an important parameter for data cables. These are important tools for producing high-quality cables and detecting irregularities during cable extrusion.

Clear visualization and scatter plot display of the eccentricity
The measured values of the CENTERVIEW PRO are shown on the ECOCONTROL 6000 or directly on the integrated display (optional). Trend data, statistical functions, FFT and SRL analyses can also be clearly viewed. The display of the measured values are viewed as a scatter plot. Each point in the scatter plot corresponds to a highly precise individual value of the eccentricity and represents the distribution of short-term fluctuations. The alignment of the scatter plot helps the operator to, among other things, center the extruder crosshead, if necessary. The SET POINT control module can be used to control the diameter to the target or minimum value.
Using the new CENTERVIEW PRO ensures the highest cable quality, optimizes production and saves costs simultaneously.
Your benefits:
- Eccentricity measurement on a new level, based on over 50 years of experience
- High measuring rate for precisely measured values, 500,000 measuring points, 5,000 high-precision measurement values (per second/per measuring axis)
- Reliably measured values, even if the position of the cable in the measurement field changes
- FFT analysis for detecting irregularities during extrusion
- Scatter plot shows short-term fluctuations in eccentricity for maximum production reliability
- Highest cable quality, optimized production and cost savings


